每次写完一篇文章,都要手动执行hexo g && gulp和hexo d去生成静态网页后在进行部署到GitHub page和Coding page上去
而且为了保存文章的源码md文件还需要push到对应的仓库分支上,比较麻烦 就想到了自动部署 网上找了一下最后用Travis CI
思路
- 本地写完文章 => push GitHub => GitHub触发Travis CI构建 => 执行命令 => 部署 => 完成
Travis CI设置
- 然后选择你要使用的仓库(放hexo博客的仓库)
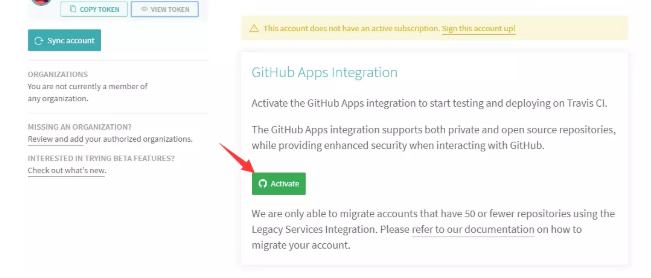
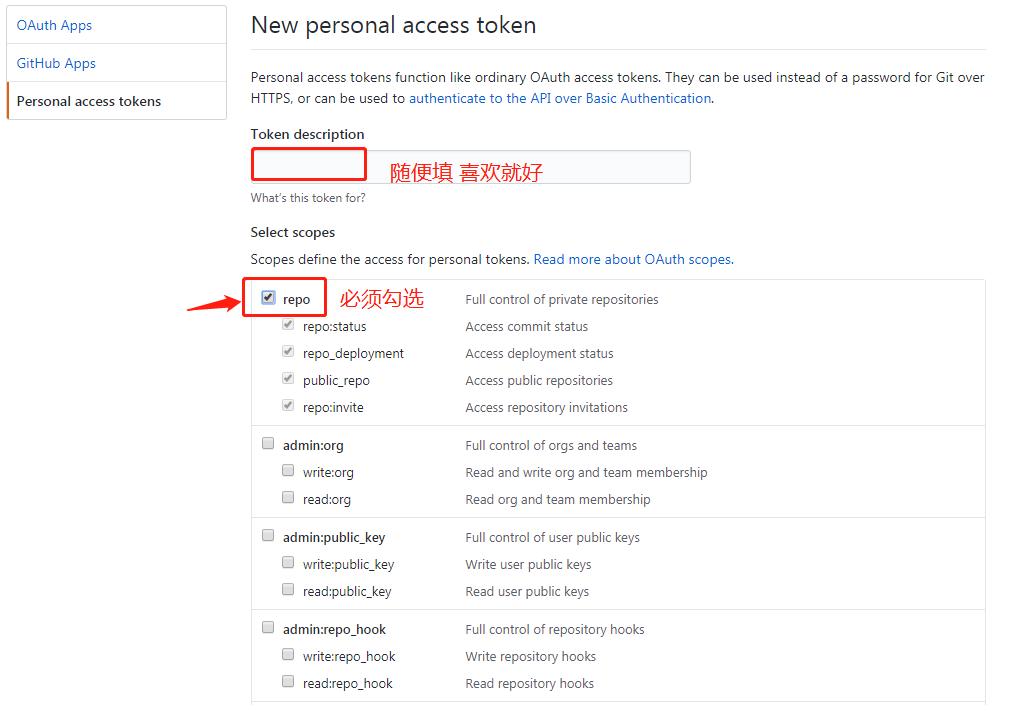
- 接下来生成GitHub和Coding的Token(生成后页面不要关闭 最好在新标签打开 方便后面复制)
GitHub传送门GitHub
点击 Generate new token 来生成
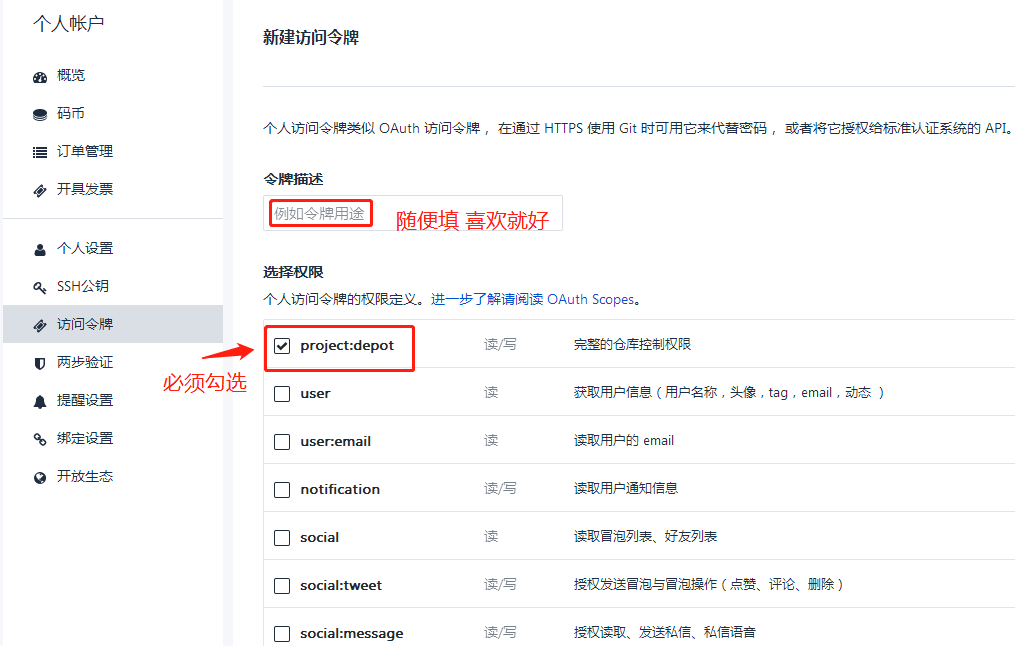
Coding传送门Coding
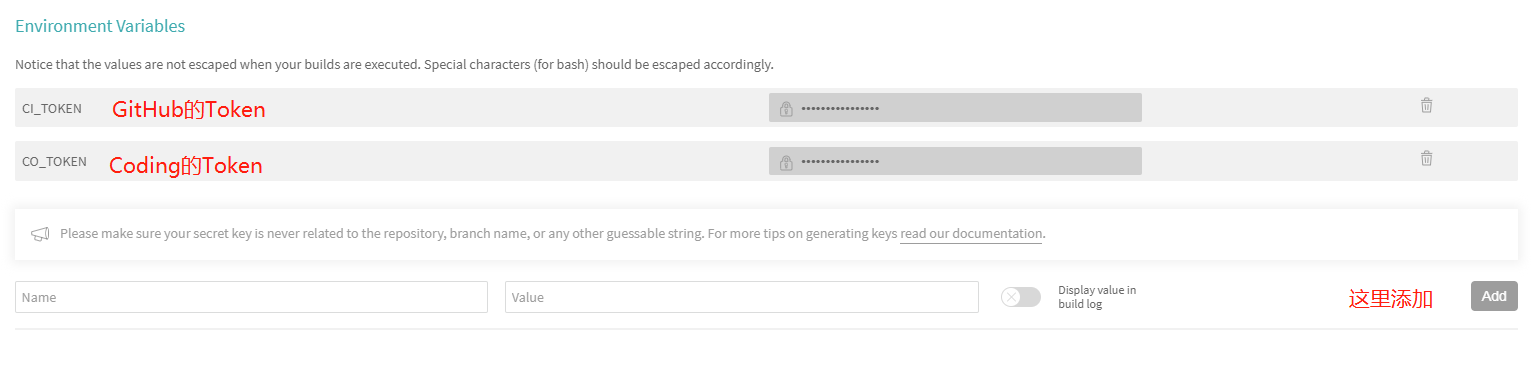
点击右边的 Settings 来添加环境变量(复制刚才生成好的Token)
- CI_TOKEN是GitHub的Token
- CO_TOKEN是Coding的Token
在项目根目录新建 .travis.yml 文件
1
2
3
4
5
6
7
8
9
10
11
12
13
14
15
16
17
18
19
20
21
22
23
24
25
26
27
28
29
30
31
32
33
34
35
36
37
38
39
40
41
42
43
44
45
46
47
48
49
50
51
| language: node_js
node_js:
# 不要用 stable 坑 版本太高 gulp的时候会报错
- 8.11.3
cache:
directories:
- node_modules
before_install:
- npm install hexo-cli -g
install:
- npm install
script:
- hexo clean
- hexo generate && gulp
after_script:
- cd ./public
- git init
# GitHub用户名
- git config user.name "GitHub用户名"
# GitHub邮箱
- git config user.email "GitHub邮箱"
- git add .
- git commit -m "auto commit by TravisCI at `date +%Y%m%d`"
# GitHub Pages
- git push --force --quiet "https://${CI_TOKEN}@${GH_REF}" master:master
# Coding Pages 这里的 xxx 是你的Coding名
- git push --force --quiet "https://xxx:${CO_TOKEN}@${CO_REF}" master:master
branches:
only:
# 这里替换你要监听的分支
- hexo
env:
global:
# GitHub Pages(GitHub仓库地址)
- GH_REF: github.com/xxx/xxx.github.io.git
# Coding Pages(Coding仓库地址)
- CO_REF: git.coding.net/xxx/xxx.git
# 这个可以不用
# configure notifications (email, IRC, campfire etc)
# please update this section to your needs!
# https://docs.travis-ci.com/user/notifications/
notifications:
#你的邮箱
email:
- gmail@gmail.com
on_success: change
on_failure: always
|
之后就直接提交到GitHub就行了 后面的事就交给 Travis CI 去干了
注 我的仓库分两个分支:hexo和master。hexo作为默认分支,存放博客源代码,master分支存放博客生成页面